Create PO
Path: Purchase Orders > Purchase Orders > Create PO
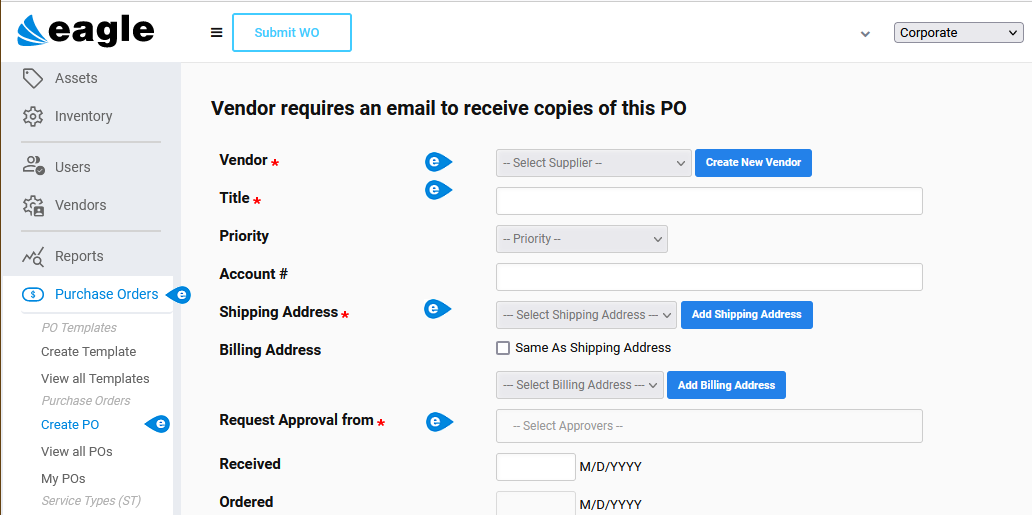
The Create PO window opens from the menu or when you click the Create PO button on the View all POs window.
You have the option of creating individual purchase orders, or you may prefer to save a reusable template for frequently ordered items. See Create PO Templates for more information.
- Open the Create PO window.
- Complete the required fields indicated by a red asterisk: Vendor, Title, Shipping Address and Request Approval from.
- Add other fields as needed.
- Select Save. The window remains open in Edit mode to add Items for purchase.
- Go to Add Stock Items to a Purchase Order or Add Non-Stock Items to a Purchase Order to complete the PO.
After completing the steps in Create a Purchase Order , use the following instructions to add items you normally have in your warehouse:
-
Expand the Purchase Order Item Section at the bottom of window.
-
Choose the Add Item button to open the Add Item popup window.
-
Use the fields below the grid to filter the list by Name, Part Number, or Assigned Assets.

-
Click the plus
 icon next to stock items to order.
 -
Close the popup.
-
Enter Unit Price and Ordered Qty.
-
Select Save.
After completing the steps in Create a Purchase Order , use the following instructions to add items not held in your warehouse:
-
Expand the Purchase Order Item Section at the bottom of window.
-
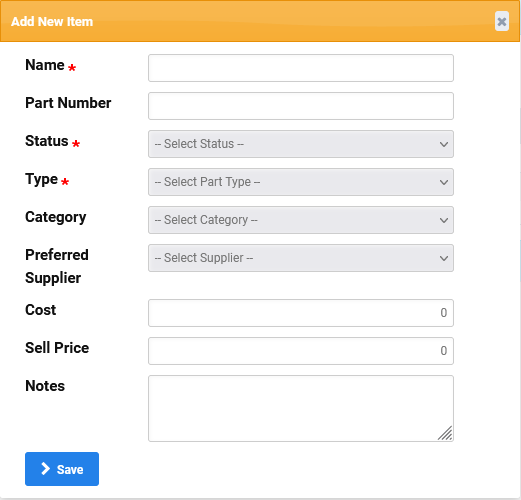
Choose the Add New Item button to open the Add New Item popup window.

-
Complete the required fields and any elective fields available.
-
Choose the Save button on the popup window.
-
Enter Unit Price and Ordered Qty.
-
Choose the Save button on the record.