Assets View All - List
Path: Assets > View All
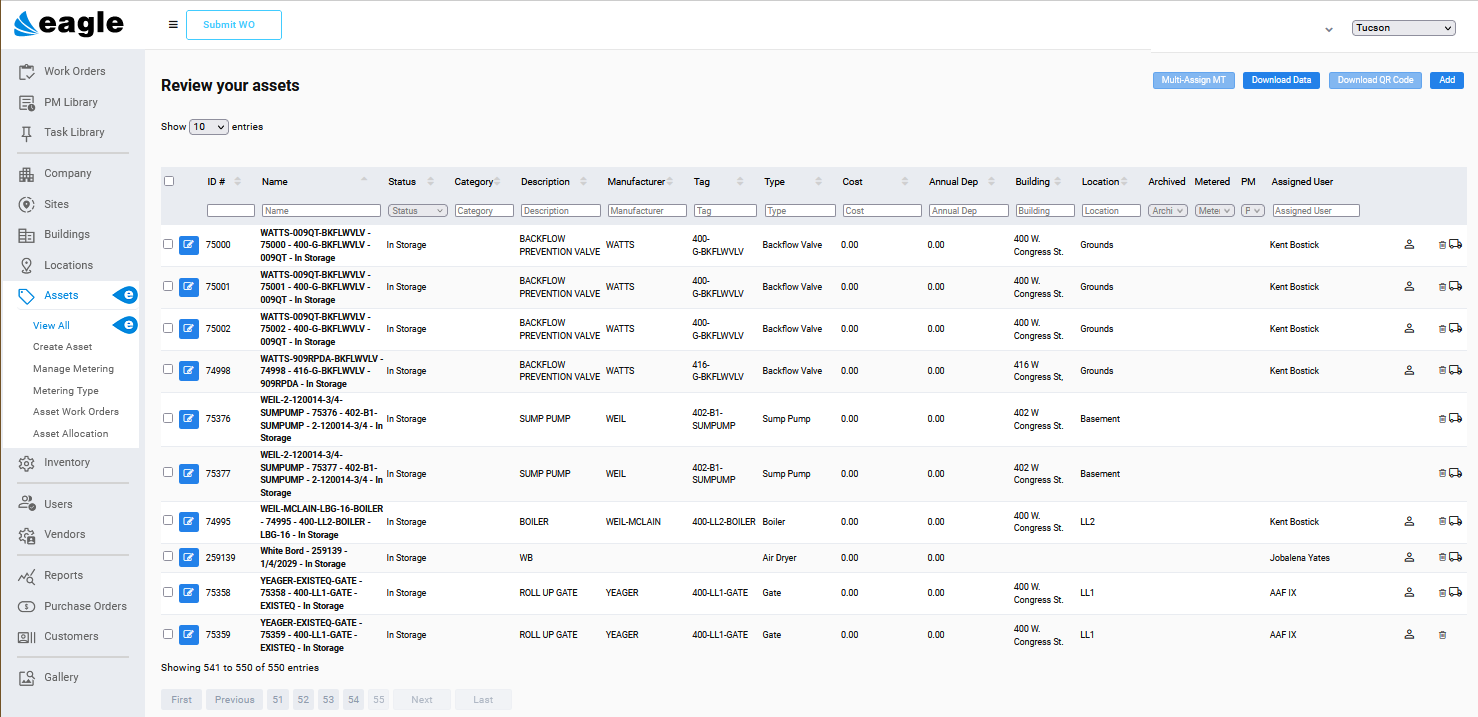
The Assets View All window shows all Assets associated with your Site. Assets can be anything from desks and chairs to air-handling units. The Name column includes the name followed by the system-assigned ID #. If you include them, the Name column also displays Asset Tag and Warranty (expiration) date.
To make any changes to a single Asset from this view, select the Edit button for the desired Asset.
When you edit records, you have the option to Save & Stay or Save & Back. The Save & Stay button allows you to continue editing the record. The Save & Back button returns to the View All window.
Buttons at the far right of the Asset alert you to attachments, asset currently down, mobile or transfer, and user assignment is true.
For information about adding Asset records, see Assets.
The far right of the View All window includes icons that give you at-a-glance information about the record.
|
Symbol |
Definition |
|---|---|
|
|
When the Asset has metering, you see this icon. |
|
|
The circled P icon indicates Assets that have PMs. |
|
|
The black Truck icon in the Mobile column shows that the Asset is moveable rather than being fixed in one location. |
|
|
A paperclip icon on the far right of the Asset View All window indicates that the Asset record Has Attachment. |
|
|
This icon shows that a User has been assigned to the Asset. |
|
|
If this icon appears on the far right of the Asset View All window, it indicates that the Asset is Currently down. Downtime is set from the Asset record in the Asset Downtime section. |
|
|
The white truck icon on the far right of the Asset View All window indicates that the Asset can be moved because it is not assigned to any work orders. |


From Assets View All:
-
Select the Edit button for the desired Asset.
-
Open the Metering section.
-
Select Add Type.
-
Click the plus sign for the desired Metering Types on the popup.
-
Enter the meter value in the Reading column.
-
Choose Save on the popup.
-
Select either the Save & Stay or Save & Back button.
The Set Trigger button is used to establish PMs based on meters.
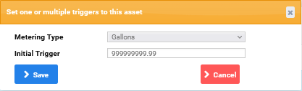
Use the Set Trigger button to choose the Metering Type and Initial Trigger value. From that point on, Eagle CMMS will generate a PM work order when the Trigger value is met.
From Assets View All:
-
Select theEdit button for the desired Asset.
-
Open the Metering section.
-
Select the green
 edit button at the end of a meter line to open the Metering History popup.
From Assets View All:
-
Check the desired Asset boxes.
-
Select the Multi-Assign MT button at the upper right.
-
Check the desired Metering Types on the Add Metering Type popup.
-
Select Save.
The View All window includes a way to download QR Code images for many records at one time.
-
Check the desired items.
-
Select the Download QR Code button at the upper right.
-
Make selections on the Download QR Code popup.

-
Select either the Download Images or Download Pdf button.